

Git
Install git using brew:
$ brew install git
Check version using :
$ git --version
brew installs git in /usr/local/bin use the where command to find out
$ where git
Set the path:
$ export PATH=/usr/local/bin:$PATH
If you see a Deprecation Notice mail from Github like
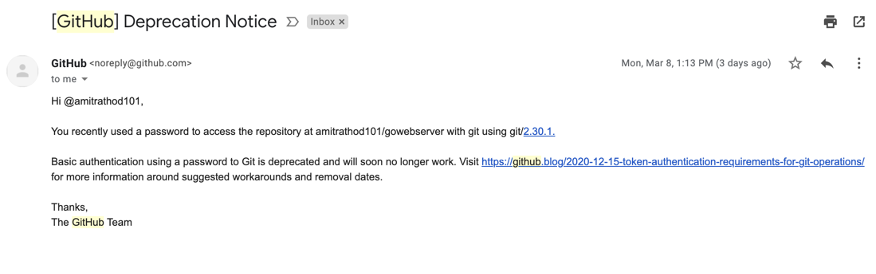
Feel free to read through the link, however for developers or simple users, go to https://github.blog/2020-12-15-token-authentication-requirements-for-git-operations/#what-you-need-to-do-today (its in the same link, but tells you what to do). Basically github wants you to start using Access Tokens instead of passwords.
Now take your time and read through the link on Personal Access Tokens. Fairly easy to follow and make sure you go through all the steps until adding the
You can view all of your settings and where they are coming from using:
$ git config --list --show-origin
I use --show-origin to see where the values are coming from which file.
You can set your Name and Email address using
$ git config --global user.name "Amit Rathod"$ git config --global user.email amitrathod@example.com
We are using the global option here to do it once , git config takes global and local as two options when setting up config.
The first thing which I would like to do is to setup VSCode as my default editor, so
$ git config --global core.editor=code --wait
git creates a default branch and calls it master, I would like to change it to main. So to set the default branch name I use
$ git config --global init.defaultBranch main
It’s important to note that git diff by itself doesn’t show all changes made since your last commit — only changes that are still unstaged. If you’ve staged all of your changes, git diff will give you no output.
HEAD points to the new branch once you run git checkout
Basic Commands
Fork the introGit repository
(Fork creates your own copy of the repository that you can use for the rest of the lab)
- Login to your github.com repository
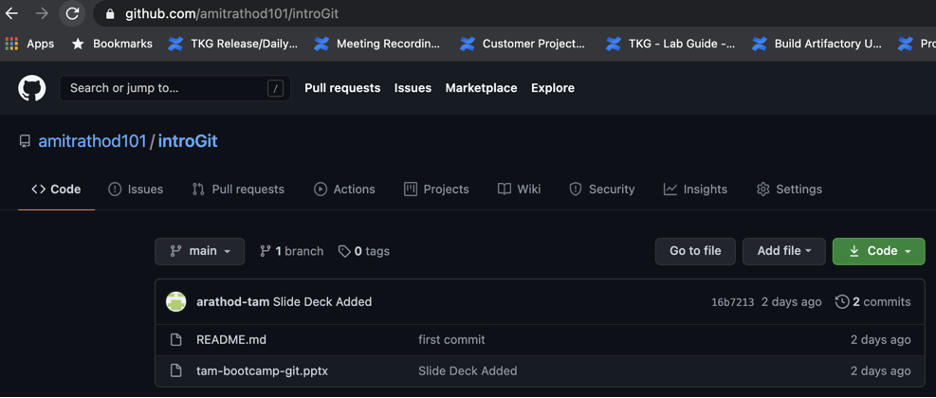
- Go to amitrathod101/introGit
- In the upper right hand corner, select "Fork"
- When it asks you where to fork introGit, select your personal repository
- Now you should see "introGit" under your repositories
Clone the sample project in your repository onto your laptop
- On your laptop, create a directory and cd into the directory
$ cd /users/<your home directory>$ mkdir github.com$ cd github.com$ mkdir <the name of your github account>$ cd <the name of your github account>
- Now you will make a local copy of the introGit repository
o Enter the git clone command (your command will vary)
$ git clone https://github.com/<the name of your github account>/introGit.git
o Change directory into the newly created introGit
$ cd introGit
o Look at the contents of the folder, notice the hidden .git.
$ ls -lah
o Do a git status. git status will be used often to provide information on your current status.
$ git status
Modify/Checking a file
(The following few commands (status/add/commit/push) show you how to make changes to a file and check them into your repository in git)
- Let’s edit a file using the "vi" editor (if installed) or any other editor of your choice
$ vi README.md
OR
- make a change (any change you want) in the file like:
$ echo "# learnGit - my first change" >> README.md
git status
- "git status" provides you with the state of the current git commands
- Enter the following command:
$ git status
- git then gives you the following output:
On branch mainYour branch is up to date with 'origin/main'.Changes not staged for commit:(use "git add <file>..." to update what will be committed)(use "git restore <file>..." to discard changes in working directory)modified: README.mdno changes added to commit (use "git add" and/or "git commit -a")
- The output tells you that the file, README.md, has been modified. It also tells you that you can use "git add README.md" to start tracking the file.
git add
- The "git add" command prepares your file to be tracked.
- Enter the following git commands:
$ git add README.md$ git status
- You should see output similar to:
On branch mainYour branch is up to date with 'origin/main'.Changes to be committed:(use "git restore --staged <file>..." to unstage)modified: README.md
- This tells you that your changes need to be "committed"
git commit
- Now that you have added your file, you need to "commit" the file
- Enter the following command
$ git commit -m "added notes to README.md"
- You will see output similar to:
[main b7150cf] added notes to README.md1 file changed, 3 insertions(+)
- Next, let’s get the status again. Enter the following command:
$ git status
- You will see output similar to:
On branch mainYour branch is ahead of 'origin/main' by 1 commit.(use "git push" to publish your local commits)nothing to commit, working tree clean
- This is telling you that you need to use "git push" to publish your changes to README.md
git push
- git push takes your changes to README.md and pushes them up to the remote repository
- Enter the following command:
$ git push
- You will see output similar to the following, which tells you that the changes to the file have been published to your repository:
Enumerating objects: 5, done.Counting objects: 100$ (5/5), done.Delta compression using up to 8 threadsCompressing objects: 100$ (3/3), done.Writing objects: 100$ (3/3), 411 bytes | 411.00 KiB/s, done.Total 3 (delta 0), reused 0 (delta 0), pack-reused 0To https://github.com/amitrathod101/introGit.git818263e..b7150cf main -> main
- Go to your github.com account and look at the changes you made to the Markdown.
- You should see the line(s) that you had changed on your laptop are now pushed to the repository
git restore
- git restore can be used to recover a file if you accidentally delete a file in your local directory
- First, delete the README.md file from your laptop
$ rm README.md
- Now, let’s use git to recover the file using the following command:
$ git restore README.md
- List the files in the directory to show that README.md has been restored using ls
- If you want to restore a previous version of a file from the master branch, you can use the following command
$ git restore README.md
git log
- The git log command gives you detailed log information on the commands that you have used
- Enter the following command:
$ git log
- You can also try "git log --decorate --graph --all" OR "git log --oneline --decorate --graph --all" OR "git log –oneline --pretty" --> Whatever works for you!
Advanced Topics
git fork
- The git fork command makes a copy of another users repository and places it in your repository. The fork is a completely separate copy (i.e. you do not get any changes made in the original repository)
- Go to github.com and search for anything you like, in this case, I am simply searching for "powercli"
- Search for the "powercli" repository
- In the upper right hand corner select "Fork"
- Look at your repositories to view the new fork
- You can now do a "git clone" from your forked repository onto your laptop
git pull
- When two or more developers are working in the same code base, they are adding/deleting/modifying the same or different files. You will want to pull down these changes during the day to make sure everyone on the team is using the same codebase for development.
- In this example, Developer 1 adds a new file to the introGit repository. Let’s simulate adding a new file into the repository:
o Use the "Add File"->Create new file in the github web screen
o Name the file "test-pull"
§ Add a comment to the file
§ Save the file (at the bottom of the page)
o Look at repository in github and you should see that the file "test-pull" has been created:
- Now, you as Developer 2(it’s yourself actually, just imagine another person), want to "pull" the latest changes from the repository into your local directory
- Do the "git pull" command below:
$ git pull
- If you do an "ls -al", you should have pulled down the file that dev 1(yourself again) created.
- Best practices for using git pull
o Pull every morning
o On very heavily used repositories, pull multiple times during the day
Branching
- When you create a branch, you create an identical copy of the project at that point in time
- First, let’s explore the concept of remote branching and then local branching
Remote Branching
o Remote branching occurs in the github.com repository (hence, being "remote" from your local laptop)
o You would use this for a project team...all team members work in this branch
§ Navigate to your repository in the github.com web page
§ Select the dropdown under the main branch
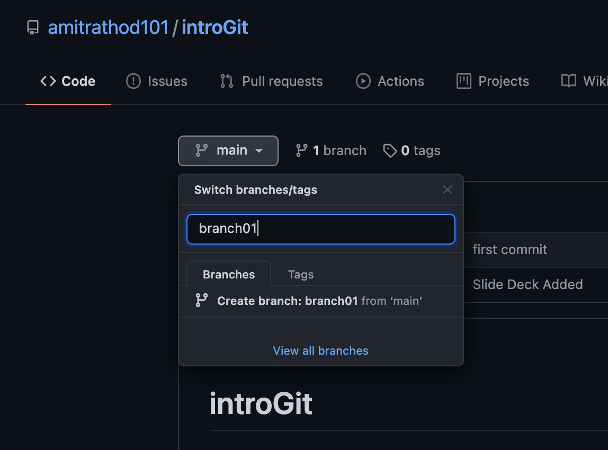
§ Create a branch called "branch01".
§ Now the number of branches changed to (2) and the default branch is "version-1"
· The branches you have are "main" and "branch01"
· You are automatically switched to the new branch, branch01
· Any changes you make to the files in the repository will be applied to this branch
§ Go to your local repository on your laptop and get any changes using git fetch:
§ The fetch command will just get the metadata, you could also do a git pull too!
$ git fetch
§ This updates the remote branch
§ Take a look at your available branches. The current branch is noted by an "*
$ git branch -a
Local Branching
o This is a branch that only "you" can see. It only exists on your local machine
o Let’s create a local branch:
$ git branch laptop-branch
o Let’s view the current branches:
$ git branch
Note *main is the current context
o You are still on the main branch. Let’s switch to the new local branch:
$ git switch laptop-branch
§ Note *laptop-branch is the current context
§ Note: git checkout -b will create the branch and switch contexts
§ In our case we created the branch using the command git branch so that is why we choose git switch.
o You can compare branches using the following command:
$ git diff <local-branch> <origin/remote-branch>
Handling Conflicts
- Conflict from browser
o Go to github.com// , click on the README.md file and then Edit using the pencil. Add a line there, put in a commit message and then commit.
o Now on the browser, your README.md file should show the change you made a step earlier.

o Now on the local machine, we don’t have those changes yet, until we do a git pull. We want to simulate a Conflict and hence we wont do git pull or git fetch yet.
o Edit the README.md file now , make sure you add a line(or edit the line) to the same line which you added in the first step of this section. For the sake of brevity, I have just shown the first line keeping other lines as is.

o Try to checkin the changes using the following commands:
$ git add README.md$ git commit -m "simulate a conflict"$ git push
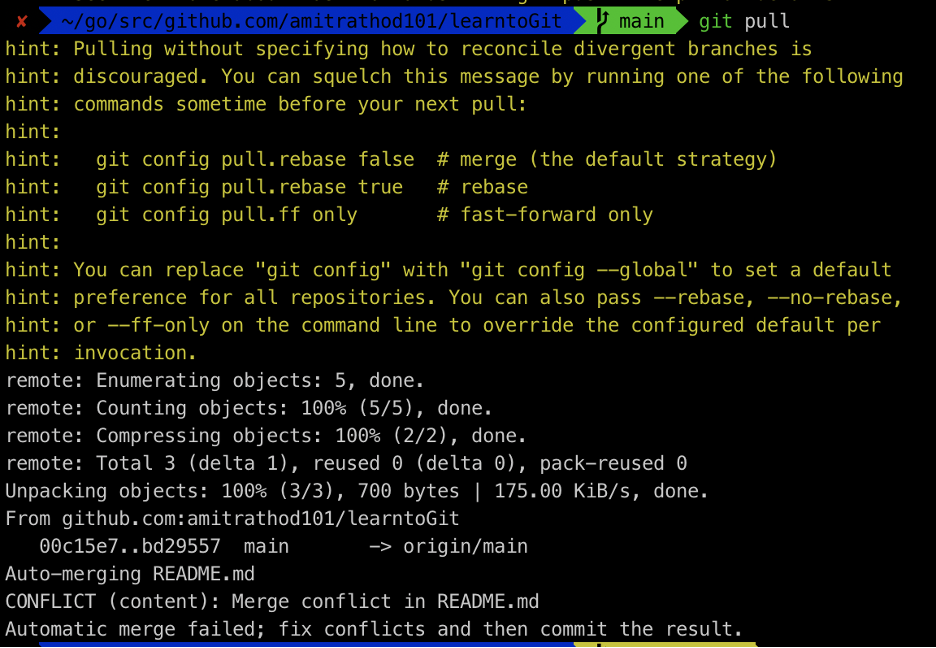
o You should see output similar to:
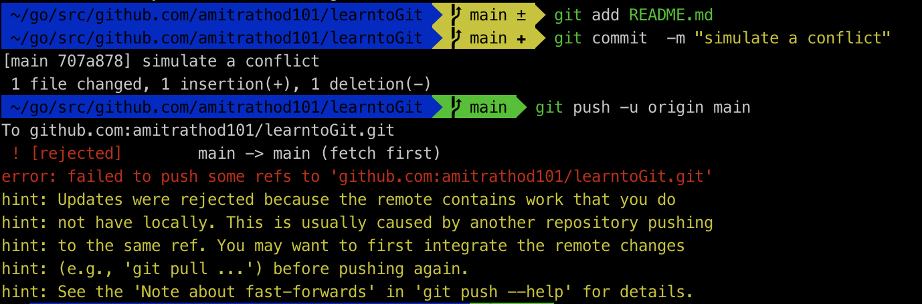
o Note that the output is giving you a "hint" to do a git pull…Let’s try that:
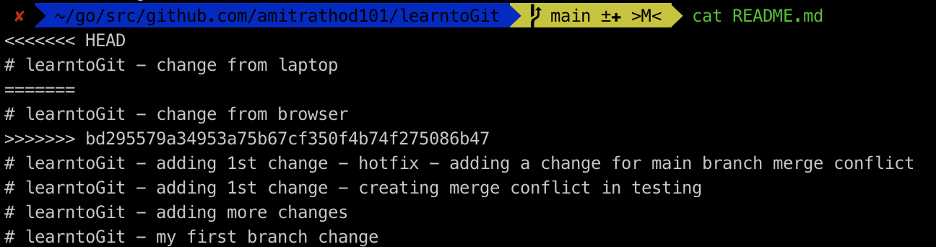
$ git pull
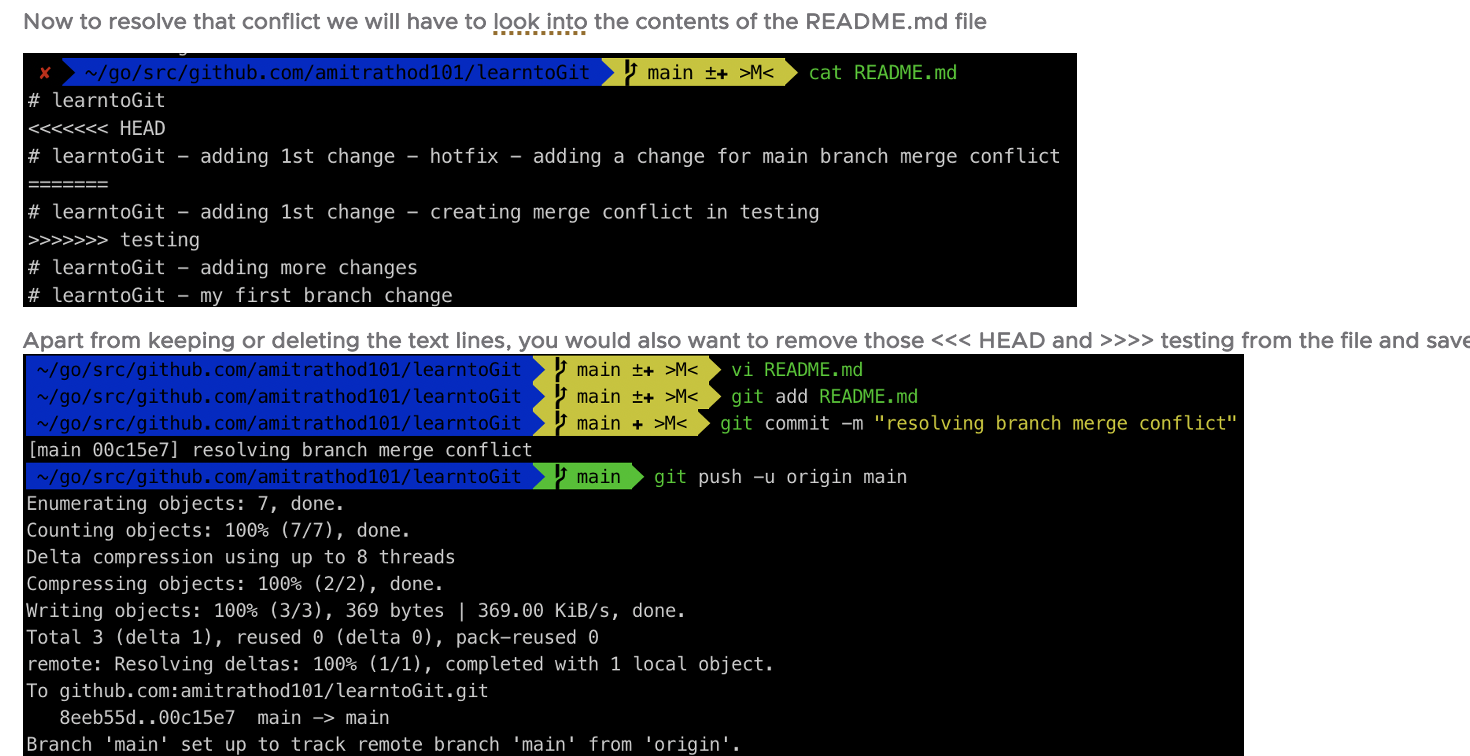
The next part is not as obvious. Edit the file using the editor of your choice and remove the parts which you think should NOT be a part of and save the file. At the end the file should look like how you would want the file to look like.
o Then follow the standard add/commit/push procedure to check in the file. Make sure to add a descriptive comment to tell others which lines you changed and why
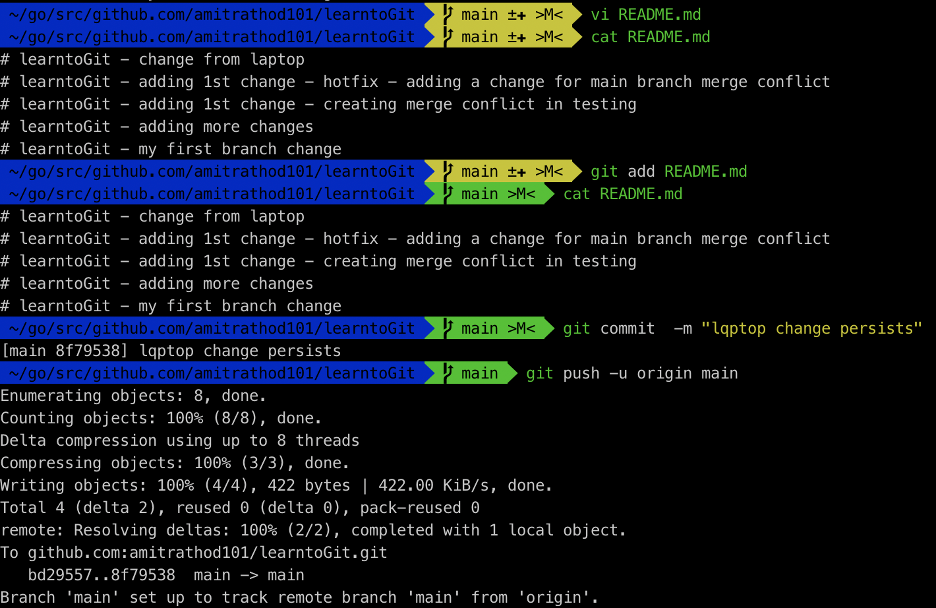
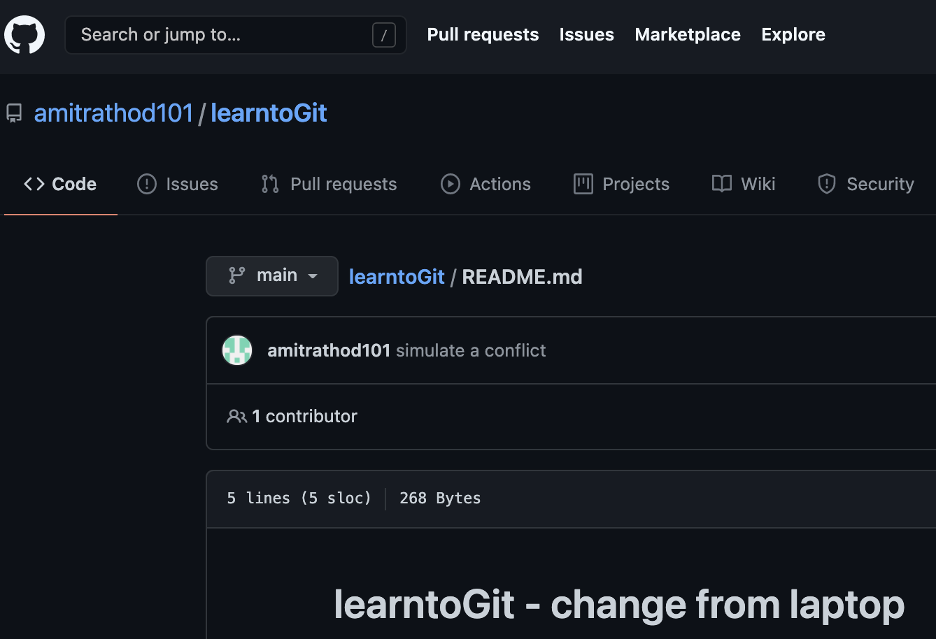
o Look at the file on github.com
- Conflicts from branch merging
o Let’s simulate a scenario where a developer is working on a piece of code where he needs to do some testing and hence naturally he/she will create a new branch and call it "testing". While he/she is going about in the day, he/she is being told by his/her boss that an urgent hotfix is required by a customer and he/she is asked to leave whatever he/she was doing and start working on the hotfix immediately.
o First creates a branch first using
$ git branch hotfix
o Then moves from the main branch to the hotfix branch using
$ git checkout hotfix
o Makes changes to the code, in our case README.md
o Checks the status using
$ git status
o Does git add README.md
o Does the git commit -m "hotfix change"
o Now the fix is ready in his/her "hotfix" branch. The next steps could be rounds of code review, E2E tests or submitting a pull request. Assuming all this went well. Maybe he is the only developer or the maintainer of that code.
o Now he/she checks out to the main branch using
$ git checkout main
o Now he/she does the merge using
$ git merge hotfix
o Now he/she looks at the code to see if the changes from the hotfix made it to the main branch.
o If all is well, now he can get back to his work which he/she started earlier in the day while working on the testing branch.

git ignore
- As we have already seen, git constantly looks at the files in your directory to determine what needs to be pushed up to the remote repository. If it sees a new file, it tells you it is "untracked". The problem is that not all files should be pushed (i.e. log files, executables, credentials files". The .gitignore file allows you to specify which files to ignore
- Let’s go back to your local repository
$ cd introGit
- Create a file you do not want to check in and put in some random text
$ vi top-secret-file
- If you now do a "git status", git will show the file as "U" - untracked
Untracked files:(use "git add <file>..." to include in what will be committed)top-secret-file
- In that same directory create a .gitignore file and type top-secret-file
$ vi .gitignore
- Save the file
- Now do a "git status". The output should no longer show "my-secret-file" as untracked.
This ends the scenario of branch conflicts.